Showing posts with label grow. Show all posts

Grow Towers and Deep Water Culture

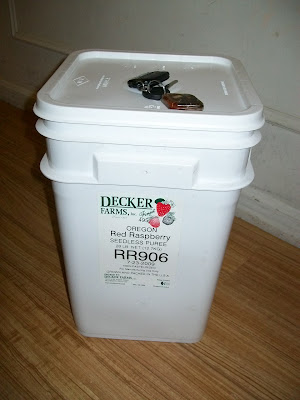
The humble plastic pail with my keys on top

I picked up some barrels from Nova Barrel. Today I wanted to show you what Im doing with these nifty square 4.5-gallon pails. Next week Ill show you the compost barrel, the black soldier fly harvester, and the potato barrels...

Ive played around with deep water culture, sometimes called "floating raft." But you dont have to have a floating raft. You just need to be able to keep the plants roots in the "nutrient solution."

For now lets hit the trust button that I know how to plumb this into my system. I find Im better at showing than telling, so let me show you what Ive done so far.

Pail with holes and net pots

I pulled out my 2-1/4 inch hole saw (the same one you use to cut holes in doors for doorknobs). Turns out this is the perfect size for one of the standard sizes of net pots. I drilled four holes in the corners of the pail lid. Ive already wedged the net pots into the holes in the picture above.

I also drilled small holes in the center of the pail lid. These will allow water to drip into the pails. Below is a picture of the pail with a 3 foot vertical grow tower resting in the center.

Grow tower supported by the pail

Ill be plumbing these into my system sometime in the next week. Ill fill the net pots and tower pockets with hydroton, then planting can begin.

You could do this with regular round 5-gallon pails. There are lots of pail-based deep water culture systems out there, though I dont think Ive seen any connected to an aquaponics system. I like the square pails because they have a flat side that will work well with the home-made grey plastic bulkhead fitting I use for the rest of my through-wall plumbing.

Heres a sketch showing how Ill achieve constant height of water in my pails (think Durso Siphon or Standpipe). A crate structure will support the flat sides of the pails and block some of the light that will otherwise get to the roots. Ill anchor an EMT loop in the crate structure to hold the grow towers upright and support the piping for the water coming in from the sump.

Sketch of aquaponic vertical tower/deep water culture concept
Read More..

Aquaponic grow room

Ive begun to build my grow room inside my shop.
Over the years I have saved materials from various construction jobs.
So far all of the materials have been free.
As the project progresses I will add new photos.

Today I established a 30 gallon tank by using water and gavel from my existing pond.  Water is clearing slowly, but the real test will be when I check to see how well its handling the ammonia.

UPDATE:  
Here is something interesting.  The bacteria in my pond filter failed to quickly establish a biological bacteria in my new filter.  I added (about 8 cups gravel in a 30 gallon tank) At first I thought the bacteria either went dormant or died in the winter, but when added to ammonia to the established system quickly converts to nitrate so it must be that it more inoculant  is required.

Windows are temporarily held in place.
Read More..

Tanks and Grow Media


If I only knew then what I know now...


I like these troughs I found at Tractor Supply.  They are a bit shallow, but I think they will do very well.
Heres an update to my expansion using bunk feeders.
Im seriously considering this long one (approximately 10"Dx24"Wx108"L) for a grow bed.  $154.00

These would make a nice fish tank.  The big one is about 300 gallons. 5Dx3H  $250.00


After building my own tanks from both 45mil EPDM and the pond liner they sell at Home Depot I would lean toward these heavy duty Rubbermaid Structural Foam Stock Tanks, because they are less likely to leak, easy to clean, easy to insert bulkheads into

I have also built an IBC system.  But polyethylene is not UV proof.  This round tank appeals to me because it would be less difficult to manage than a 4 deep IBC fish tank.   

My relentless quest for a reasonably priced media has finally turned up Pumice.

UPDATE 12/3/2012
Pumice has turned out to be a great media for net pots, but it packs, and I believe it would tend to clog if used in an aquaponic media bed where the purpose of a media bed is to filter the solids.  It might be acceptable in a hydroponic or bioponic system where solids are not an issue.

The pumice I bought looks exactly as in the picture.
The size ranges from about  3-8 mm.
The pieces are very hard and do not easily crush.

I crushed a piece with a pair of pliers.  Then I rubbed it between my hands.  Some particles first appeared to be long and pointed, but the rubbing caused them all to break down into irregular grit.  There were no sharp shards left in my hands afterward, and nothing that looked sharp remained.  It tends to form roundish particles.

Its extremely easy on the hands.  Its soft on the skin and nails; not at all like feather rocks or lava rock.  There are no shape shards, and if it brakes I doubt that it would create sharp shards. When it was dry it felt like placing my hands in puffed rice.
The best description I can think of is like heavy Perlite

After soaking for approximately 20 hours about 2/3 sank and the other 1/3 remained floating.  It was easy to separate the sinkers from the floaters.
After two days 95% had sunk and eventually all of it sank.
I would suggest rinsing well as the water was a bit cloudy.

When I rinsed it, the first water changed from pH from 8 to 6.6, but after several rinses the pH did not change.  
The cost was $28 per 1/2 yard.

I would assume that it is available at many garden nursery suppliers so availability is less of a problem than expanded shale, and yet the price is well below clay medias.

Overall I think it would be a very good media for ebb and flow if some protection were put in place to screen the very small particles.
The material could be separated according to size with a screen, but it packs well enough that it does not fall through the cracks of a net pot like the clay balls, and yet continues to drain well allowing for plenty of air.


Im very impressed by it, and look forward to replacing all of my other medias including Hydroton.  Considering the price it is well worth taking a look at.

  
The pumice worked in a net pot.  Fewer grains fell through the pot than if I had used Hydroton.


Read More..

DIY LED Grow Lights

There are a number of problems associated with grow lights
  • Expensive to purchase
  • Require expensive ballasts
  • Expensive to operate
  • Short limited life spans
  • Hazardous materials
  • Fragile
  • Excessive heat
  • Limited K values
 
After quite a bit of investigation I have come to believe there are two types that stand out
  • Ceramic Metal Halide (CMH)
  • LED

Neither is cheap to purchase and at this time LED is very expensive, but I just found components to build your own LED light bar which exhibit none of the problems Ive listed above!

A Standard LED Grow Light

The components to build and equivalent 400W 36000 lumen grow light at less than 1/2 the cost!


 To build the equivalent grow light would require one PCB and 40 LED Chips at a cost of about $100 plus some labor and a few items like Power supply, solder, wire and box.

This is just one of many LED K values that are available and a wider spectrum could be made by including other K valued LED Chips.

12V power supplies are very inexpensive thanks to the computer industry. 

Total cost about $200

While searching for your components you may find some bulbs are listed in mcd rather than lumens.  Here is a converter calculator to help you design the grow light you wish to build. 


Coming Soon!  New LED technology
http://www.bbc.co.uk/news/technology-22106718

Read More..