Showing posts with label time. Show all posts

Thinking Not time like the percent

I wonder if our current wacky time system has any psychological side effects. If humans think $4.99 is still in the $4 range, then perhaps we think something odd about time.

Perhaps a stopwatch showing 1:50:00 is a bit close to one and a half hours or something. Perhaps thats why I leave it until the last minute to get into the shower before going to a restaurant. Perhaps I still think I have half an hour up my sleeve when really I have only ten minutes.

Its stresses like these that make people drink 1.02110316 × 10^-54 cubic Parsecs of Tequila with a slice of lime and a pinch of salt, over and over until comfortably numb.

Personally, I think we should go with the Parsec for everything. Or...

We could make everything very very simple.

Some time ago, I remember asking mum why we (Australians) were so historically insane as to have once had one Australian Pound be made up of twenty shillings, which were each subdivided into twelve pence.

She thought I was over-reacting.

People often do.

Until you ask them to do some calculations.

Perhaps a currency like that made it a simple task to buy things with the weights they were using at the time... lets see... there were sixteen ounces to the pound, fourteen pounds to the stone, and eight stone to the Hundredweight.

Easy!

If it cost one Pound, eighteen Shillings, and eleven Pence to buy one Hundredweight of paraffin, how much would it cost to buy four Pounds (no, the other Pound) and thirteen ounces. Obviously that would depend on which kind of paraffin. Theres a 2/11th discount on the impure stuff, but not on the pure stuff. So lets make it simple and work it out for the pure stuff.

Mum?

Mum?

I tried to explain why I thought it was insane, by attempting to teach her to count in a way that started in base 12, then rapidly insaned into base 20 for the next digit (or digit like thing), before settling out into base 10 the subsequent digits (I presume).

I got very confused.

Imperial units are funny.

People must have just tried to avoid calculations that involved all the "layers" (ie pounds, shillings, and pence) It seems odd, but I guess people chunked their prices into easy to calculate amounts.

Quarters, halves - that sort of thing.

Im guessing shopkeepers just made up prices as they went along as well. Whos going to check?

For a modern day example for people living in a metric world, without thinking too much, on paper, in your head or with a calculator, try adding ...

11:44:29 hours, minutes and seconds to
03:19:51 PM

Not so difficult, but it hardly trips off the tongue.

It makes me think that perhaps we avoid doing it. Perhaps its just too hard, so we only use the easy chunks of time. Quarters, halves - that sort of thing.

We need a new metric clock.

Our current clock is loopy.

Anything where your first digit is in base ten, then your next isnt, should be shot in the foot.

How do you even write a time calculation?

I think a semicolon would be more appropriate.


    1/2 ; 3/12 ; 19/60 ; 51/60 ; 00/100
+        11/12 ; 44/60 ; 29/60 ; 81/100
-------------------------------------------
=                                    ##:##:##.## am/pm


Perhaps percentage of a day might be better.

So 6pm would be 75.00 oclock

It would be easy to learn, would allow easy calculations, unlimited resolution if it mattered, and the Swiss would love the economic stimulus.

It would save the world a few lines of code when designing stopwatches as well.


120 Things in 20 years thinks no sleep yet and 6am means its time to buy a new internal clock.

Read More..

Theres still time to plant your winter crops

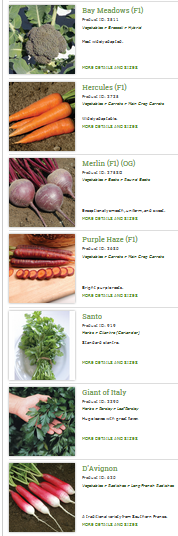
 Redwood Seeds has these to offer
 &
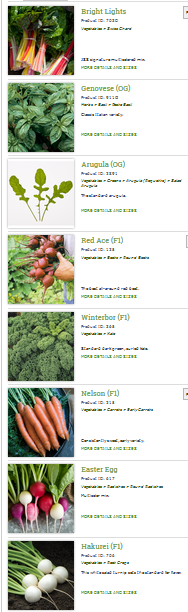
Johnys Select Seeds recommends these winter vegetables.


Read More..

Making smoked foods Tin can smoker

As far as I can tell, everything worth eating, is worth smoke curing.


As a result of a gift from my other mother, we have one of these in our yard.

Shiny!

And poorly photographed!

"Poorly photographed", is a new style Im exploring a bit in this post.


A gas BBQ is all well and good, but as part of the move to gas, we tend to miss out a bit on the flavours that woodsmoke can provide.

Gas = good

Wood = good

Gas AND woodsmoke = amazing!

An extremely important part of this "Thing" is the humble tin can. I say humble, but Im not really sure if a tin can actually does humble.

Im guessing a tin can mostly does tin can things.

Lurking springs to mind.

Shinning might also rate a mention if its a fresh one.

Mines a fresh one.


Shine can, shine.

Lurk can, lurk.

A tin can can also have holes punched through it with an old mini-screwdriver, but Ill get to that a bit later.

For now, Ill introduce the backbone and or possibly un-necessary briquette.

Backbone, because it provides the heat that drives the smoke.

Un-necessary, because it might not.

I cant really tell what contribution this stuff made, other than it was used, and the result was good.

I also dont know enough to endorse any product you might see in this post, so take everything I say as you always should, with a grain of bacon salt.


Now is probably a good time to say that none of this stuff is my idea or anything (except perhaps using a screwdriver as a drill, and then enlarging those screwdriver holes with a bigger, thicker screwdriver ) but rather, its a collage of everything Ive read over the last few days, and the implementation is based on trial and error in real time, bizarre ritual, and risking tonights meal.

DO try this at home. (except maybe the bit about ramming a screwdriver through a can of burning coal)

Anyway...

The briquettes look like this up close.

They look like brown coal, but I suspect they are made of more recent trees. Checking...

Ok... well it seems the packaging reads "Not suitable for barbecues. Probably something I should have read before buying it. Perhaps it shouldnt have been displayed in the BBQ section of the hardware I bought them from.

You live and learn.


I hope this isnt what made todays smoking such a success.

I have no idea whats in these things, so please dont use them unless you find out, and then please tell me what they are made off so I can seek whatever medical attention I might need.

Im sure Ill be walrus.

Anyway...

other things to show and tell, include hickory chips.

I ended up using around two cups for my two chicken thighs, but Im guessing it would make no difference how much stuff I put in the BBQ. It would still take around two cups.

Two chicken thighs in a BBQ is a total waste of energy, but I didnt want to waste too much food if it all went wrong.


I also bought some fire starter cube things to get the briquettes that are unsuitable for BBQs alight.

I have no idea what these things are made of.


If I ran an unscrupulous country that wanted to get rid of its toxic waste, Id just shape it into things and export it as products.

Outdoor furniture and so forth.

So, I smacked a few holes in my tin can with a rusty old mini-screwdriver thing.

I knew it was sharp enough for this task, because every other time I use it for a task it wasnt designed for, I manage to gain a body piercing of a part of my hand that was never designed to receive such a thing.

This time I hurt nothing but the can, because it turns out cans are pretty thin.

Confident stabs make smaller dents in the can, and cleaner holes.

Stab confidently.


I punched two extra holes at the top to thread a loop of wire through to act as a handle.

Probably not required, but I did use it at the end of the day to pick it up and put it under a water tap to make sure any leftover fire was safely out.

So... add a handle if you have a handy coat hanger or length of wire.

Pliers also work as a handle.


It took way too long to get the briquettes going because there was clearly not enough oxygen getting to them.

The flames were there, but they started at the top where they met fresh air rather than at the fuel where a fire should be.


So I "extra safely" punched a few more holes through, then made them bigger with a thicker screwdriver.

It turns out its probably not a good idea to do this when its burning, but it worked out fine in the end.


The fire took on a much more healthy glow, and I held back on adding too many holes to the lid, because I figured I might need to damp the fire down a bit because I want smoke not flame.

You cant really see it in the pic, but the flame actually looked like it was coming in through the holes at the bottom. Like an inside out gas burner. Like the fuel was gasing, and the flames did what they did to seek the oxygen.

Interesting. And a pretty handy tin can stove.


To be honest, I dont really understand why this was burning like I wanted it to when I wanted to get it alight, but then settled down to what I wanted it to do when I wanted smoke.

All the photos above include flame from the fire starter things, so perhaps its just a case of them burning with a bit more gusto than the heat beads and wood chips.

Or it could be the water soaking of the wood chips.

Did I mention that? The wood chips were soaked in water boiling water for a few minutes before being added to the tin can with the glowing briquettes.

I suspect they dry out before they start to smoke, so perhaps its just to stage the wood chips so they dont all go up in flames at the same time. As far as I can tell, it should be possible to either make them burn in stages by wetting them, creating only a small section at any one time thats dry enough and hot enough to start smoking, OR restrict the airflow and choke them to whatever combustion rate you want.

Perhaps the water soaking has some other reason. Ill let you know if it turns out to be important.

Smoke!

Lots of it.

I didnt push the number of holes, because I didnt want it to go to flame, but I got the feeling I could have made as much smoke as I wanted simply by adding more.


There was quite a bit of slack space between it burning , and it smoking. If I put out the fire, it would take a lot of blowing at the holes around the bottom to get it to flame again. (I only did this to test how forgiving it was) The result was that it seemed to prefer to make smoke rather than fire unless it was really coaxed into flame, and even then it settled back to making smoke.

Clearly it knew its designated task.

Ill play a bit more later, and theres always the lid to damp it down if needs be.  I might even add a second lid so I can turn it like a tap to adjust it. ie, a big hole in each lid, and overlap them so you can change the size of the hole.

I was concentrating on air in, but controlling air (or exhaust) out does the same thing. It probably doesnt matter which one you control, the result is, if you restrict the airflow over the coals, you restrict the burn, and control the smoke.

After an hour or so of smoke that was sometimes on and sometimes off, depending on what I was trying at the time, the result looked like this.

To be honest, I was a little disappointed.

I thought it would have a lot more smoke colour to it. Some of that colour on the bacon was there in the beginning. And this photo is actually a little flattering as far as colour goes.


But it was getting late so I lit the BBQ and brought the bacon wrapped, blue cheese, and tomato stuffed chicken thigh parcels (my best tying effort to date in my own opinion) up to an internal temperature of 75c.

Apparently I missed a step called brining. Ill let you know if it turns out to have been important. I think it involves marinating your food in a salt water solution before smoking like I had to do with the home made cheese "thing".

But the result was truly amazing!

Totally worthwhile.

My big fear is that this will be one of those beginners luck things, and that I will now spend the rest of my life trying to duplicate it.

Hopefully, and perhaps more likely, is that this is just the beginning of what is possible with smoking.

I hope so.

The result makes for a terrible photo, because for some reason, I went for an autopsy/science  look rather than a food look.

Never take a food cross section photo straight on.

Originally I was a bit suspicious of the pink, thinking it might be under cooked, but my digital meat thermometer said it was cooked, and it turned out the thermometer knows its stuff.


The chicken looked a bit like good bacon.

The bacon wrapped around the chicken looked like what I now call good chicken.

If anything it was actually a little over-done, but the brining step might add a bit of moisture to the final product that might counteract that.

Who knows. I cant wait to find out.

The only thing to do is learn a bit more, and do it again.

I rate this experiment with a tin can smoker a total success, and if youve ever thought about smoke curing stuff, I thoroughly recommend giving it a go.

Insanely delicious.

I hope the in(common)-laws dont read this and want their BBQ back.


120 Things in 20 years - Smoke cured stuff really rocks, and you can knock up a tin can smoker in only a few minutes.
Read More..

What I Learned From My 2014 Summer Garden

I wanted a record of this years garden.  The foliage grew so thick in the hydroponic section I was unable to track down a leak.  Usage became ridiculous and I ended up filling the sump twice a day with water rather than waste the hydroponic fertilizer. 

The bioponic systems did well.  Summer heat put a damper on everything including the tomatoes.  Even the squash seemed to regain vigor once the 100+ days passed.  Bell peppers in the hydroponic system did well, but failed due to blossom end rot in the bioponic systems.  I found [this article about Blossom End Rot] that may be helpful.

One Earthan bed became clogged by a root and I lost all the flowers on my Tomatillo, but even though a second set of flowers came back, I doubts I will get a crop.

My wicking barrels did not wick quite as well as I would have liked.  So Ill adjust the soil mix.  These barrels did not get enough sun in this location, so I will have to find a different location.  That is one of the best attributes of this simple low cost design.  Relocation is not a problem.

The vertical section will get a modification to the water supply.  I plan to install a check valve after the pump and a high pressure connection after that.  When the 1/4" tubes clog I will simply give it a blast of fresh water.   In fact this is how I will maintain the level in the sump tank.  Each time I fill the sump I will be clearing the 1/4" lines.

The 8W Earthan Bed system performed well over the summer.  Water usage was extremely low in both the wicking barrels and the 8W Earthan Beds.  Without a doubt I feel these two systems hold the most promise.  But one thing Ive learned is that any garden that relies on a mechanical system is prone to some type of failure which places the wicking barrels squarely in the best position.

I began the season using weed teas, fish emulsion, and kelp in the 8W Earthan Bed and the Vertical Garden, but the Vertical Garden was abandoned due to high maintenance (clogging).

After the other bioponic Earthan Bed clogged I began to fear that the system might become clogged, but I now feel it would have been okay since it was a root not muck that caused the problem.

But this caused me to switch the 8W Earthan Bed over to plain well water with an occasional slurp of fish emulsion and liquid kelp plus a little Fe DTPA, MgSO4, and HCl after only a few weeks.  My goal for this system was to use no urine.

Clogging is a concern I will eventually have to face with all of the Earthan Beds as I doubt even the worms will be able to keep the rock bed clear forever.   The advantage is that the water stays well aerated which should increase plant vitality and vigor. 

Water use was extremely low in this systems even though I top watered every few days.   

Im still enjoying handfuls of cherry tomatoes from every section of the garden everyday The soil less section of the bioponic system produced more cherry tomatoes than we could eat. This and the hydroponic section were the best performers.  I credit this to aeration and high nutrient levels.  The main bioponic garden (not the 8W garden) received about 50% of my fresh urine plus fish emulsion, kelp, Fe DTPA, MgSO4, and HCl.


Read More..

Glyphosate Alternatives


Let me acknowledge that glyphosate is only the "Active Ingredient" listed on many herbicides, and that its actually the unlisted adjuvants that we need to be concerned about. Unfortunately the regulations only require safety testing of the active ingredients even though the adjuvants have been found to be 1000 times more toxic.  The only other dangerous ingredient in RoundUp that I know of is polyethoxylated tallowamine POE-15. 

In an effort to avoid using glyphosate I did some research on how the kill weeds around ornamental landscape plants, pathways and driveways.  I still and always will object to Glyphosate and 2-4-D being used on or near vegetable gardens.

Here are the methods I was able to discover:

Pulling weeds by hand, and sheet mulching.  This is great for a small area


Zinc Sulfate mixed 1-1/8 oz per gallon will treat 4 sq ft.  At $12 per 10 lbs this works out to about $0.35/sq ft.  Yikes!

BurnOut Weed & Grass Killer made of a special blend of citric acid and clove oil and other patented synergistic components. If I try this product Ill post the results, but from what Ive read this too only stunts the plant and leaves the roots to grow again.  If you have used this Id like to hear about your results.

Weed Dragon is a large propane torch.  Reviews state that they are effective at temporarily removing the weeds, but repeated treatment will be required to eventually kill more persistent weeds.   Attacking the weeds again several days later seems to be advised.
The Weed Dragon delivers a 400,000 BTU while the mini delivers 25,000 BTU.  The later uses a small disposable tank, and is easily held by one hand where as the former uses a 20 gallon tank and is often accessorized with a cart.  There is also a 2.5 gallon model that is worn like a back pack.
Apparently 1 gallon of propane will last about 1 hour depending on how high the flame is turned up.  Not all models have a flame adjustment. 


Vinegar, salt, & soap mixed at 1/2 gal vinegar, 1/2 cup salt, 1/2tsp liquid dish soap will also kill weeds.  This mixture costs about $6.00/gal.  I dont know what the application rate is supposed to be, but I used it as I would use Roundup. After several applications there was only a few blotches otherwise the plants were healthy.

I mentioned this did not work and someone else told me I had the recipe wrong and absolutely guaranteed that her formula as shown above would work.  Below are the results after spraying 5 times over 8 days.  The large broad leafed plant shows only a small amount of damage.  The grass lost color but regained its strength soon after the experiment was over.
I did find that I could pour a couple ounces directly on the root area for excellent results, but causing the soil to become incapable of supporting plant life is not what Im after.  Even Roundup leaves the soil in better shape than this.

I hate the idea of supporting Monsanto or any biotech bent on destroying the earth with GMO and toxic chemicals.  But they do seem to have the only spray on products that will kill weeds.  How poisonous these herbicides are is a matter of debate.  During the past 30 years Ive never been particularly careful about handling Roundup or 2-4-D, and I dont seem to have been affected, but Ive had friends who were in Vietnam that were severely harmed by defoliants.

Of course Im not advocating that we ingest it.  Only a crazy person would do that right?  Oh yeah our GM foods have been modified to resist Roundup and therefore hugh amounts of the stuff is sprayed on our food.  This I object to, but spraying my driveway seems okay to me.

It seems too cruel but I may have to do my own experiments with Roundup.  The group of good and natural folks I would like to be able to include myself in say that Roundup destroys the life in the soil.  Somehow I doubt this.  Over time, the glyphosate can be tied up by cations in the water or it can be biodegraded by bacteria. [1] By spraying the leaves of a plant, those chemicals are taken down into the roots and might poison some of the microbiology,  but with all the bull that Ive been feed about vinegar I simply dont trust the disinformation any longer.

Heres the thing.  Dont make up the facts just to make you case.  Some organic herbicides such as herbicidal soaps and oils have been found to be more harmful to aquatic life than Roundup.  The EIQ (Environmental Impact Quotient ) of Roundup is only 15.3 (on a scale of 1 to 100).  [2]

Making up your own facts does more harm then good.   It doesnt work for Monsanto and it does not benefit the fight for a clean world.  This poor lab rat was fed Roundup.  Lets get real, nobody puts Roundup on their food like table salt except maybe the farmers using GM seeds.  So buy organic.

But dont tell me vinegar kills weeds and that its just as good as Roundup because its not. 

1. http://www.walterreeves.com/gardening-q-and-a/roundup-breakdown-in-tap-water/
2. http://www.sustainable-gardening.com/archives/403
Read More..

Photography Rock melon time lapse

 thought I might do a time lapse of a rock melon developing.

Im not sure why, but I like rock melon a lot.

The might be called cantaloupe in your part of the world.

Either way, I have some growing.

The shot looks a bit like this.

 The white splodge at the bottom is the time lapse camera.

Its facing toward the extremity of the rock melon vine centre top.

The plan is to capture a rock melon forming from scratch.

Apparently I have around a month. With that time in mind, Ive set the camera to take a frame every so often.

I really dont know how often, but having set it up, Im loathe to change anything because it would mean the loss of all the pics to date.

Thats the big problem with this camera. You dont really know when its working or not. It even pretends to be working when there is no memory card installed. That means it seems to be working, and it only takes a month before you realise the thing doesnt have a card in place.

One month to take a picture of nothing.

Oh well. It hasnt happened so far, so I guess it isnt really a problem.

This is the topic up close.

Currently its a hand fertilized flower in the last stages of its flowery existence.

Hopefully, over the next few weeks, we will see a rock melon grow to harvest.

If not, there is a strawberry runner incoming from stage left that might make for a decent set of time lapse images.


Or not.

Who knows?

A month or so from now, all will be revealed.


120 Things in 20 years - Bringing you time lapse images of rock melons. Thats it really. Time lapse images of rock melons.


Read More..

Summer is the Time to Plant Winter Squash!

Winter squash takes about three months to mature.  For a September harvest its time to plant!

Remember squash are heavy feeders so add plenty of compost below and around each plant
Time to choose your brassicas for late summer planting. 
Read More..

Mycorrhizae


I attended a class put on by Santia Morganics about Mycorrhizae.  I learned about how mycorrhizae is colonized.  These are my notes.

There are 3 major types of mycorrhizae.
(1) Endo or Arbuscular mycorrhizae (which exist on 85% of the plant families),
(2) Ecto mycorrhizae (which exist on 10% of the plant families (mostly woody plants), and
(3) Ericoid mycorrhizae (which exist on less than 5% of the plant families).
There are several other more obscure forms of mycorrhizae, but they are highly specific and not used from a commercial perspective.


Some producers grow all of their
types together whereas Santia Morganics grows each isolated from the other and combines them in exact proportions when packaging the final product.  This assures that their product contains a controlled proportion of each type.  Growing several types together will allow a few to dominate the mix.  Each type has different preferences such as pH, and therefore its impossible to level the playing field for each when grown together and some types may fail to grow.

The reason so many
types are sold together is to provide one that will find your soil adaptable.  So its important to have a a good assortment of different types.

Santia Morganics also grows their mycorrhizae  in vivo where as some other manufactures grow in vitro.  In vivo means that its grown in live plants and soil.  In Vitro is grown in a sterile media.  By growing in vivo the mycorrhizae become more adapted to interacting with actual live plants and other microorganisms.  The in vitro grown mycorrhizae fail to replicate the precise cellular conditions of an organism, particularly a microbe.

Santia Morganics sells mycorrhizae for soil and another for hydroponics. 


The later is finer and water soluable, but the process of reducing the size destroys some of the mycorrhizae so it will contain a little less. 
These two mycorrhizae products already contain sufficient amounts of nutrients to help the mycorrhizae become established quickly, but they also make a couple additives that will and promote the growth of mycorrhizae.  One is made for soil and the other is made to dissolve into water so that it can soak down into the root zone or be used for hydroponics.  These additives contain no mycorrhizae. 


 The Myco-Fusion line consists of all three types of mycorrhizae, as well as Rhizo-Charge and Bio-Jolt companion products, both which are designed to maximize yield.

The relationship between plant and fungi evolved to help the plants access low levels of phosphorus in the soil but after adding mycorrhizae phosphorous should be avoided for as long as possible because mycorrhizae do not grow and colonize roots when the phosphorus level is high.  Therefore it is best to let the relationship become established before adding phosphorous.

Mycorrhizea can survive for many years as long as it is not subjected to heat over about 120 F.  It will lay dormant until the conditions are right and a host root becomes available.  It is okay to store your mycorrhizae in a warm greenhouse so long as it is kept dry and below 120 F.

Endomycilium is the type we vegetable gardeners want unless we are growing hardwood plants such as blueberry in which case we would want
EctomyciliumEndomycilium grows inside of the vegetable roots and sends Hyphae out to feed the plant with water and nutrients.  One cubic centimeter of rich organic soil may contain 1 km of fungal hyphae. 

The mycorrhizal fungi become the interface between the soil and plant roots: the fungi colonize the roots internally, and the soil externally. Internally, the fungus becomes the interface where nutrient exchanges occur between the fungus and plant by direct contact of the fungus with the root cells: carbon energy moves from the plant to the fungus, and soil nutrients moves from the fungus to the host plant.


Read More..