Showing posts with label my. Show all posts

Aquaponics Tomato

Its cold and rainy here in South Australia, and I keep picking tomatoes.

Winter isnt a good time for tomatoes, but mine seem to be having fun anyway.

My four tomato plants that are growing so their roots are suspended in the fishtank water seem to be fruiting a lot later in the season than they should be. The plants are out in the cold, but their roots are inside the fishtank which is inside a little growhouse.

The plants look like this.


And they are still doing a lot of flowering.


And there are plenty of fruit all over the vines.


And the fruit are still ripening.

These were todays pickings.

Not many today, but there are always some. And a few didnt make it inside.

And there are a lot more on the vines that are nearly ripe. Ripe enough to eat.


All these pics were taken today. Its winter in the southern hemisphere, so the tomatoes should have stopped fruiting a while ago.

Its strange that they are still growing and fruiting this late. Strange enough that I thought Id contact someone from one of our universities. I remember someone from my research into bees, who was working on growing native bees to pollinate tomatoes. Im not sure if there were a bee person or a tomato person, but I emailed them in the hope that if they dont care, they might know someone who does.

It might save the industry a bit of money if it turned out the entire plant didnt need to be kept warm to keep them fruiting.


120 Things in 20 years says to be on the lookout for tiny hot houses with tomatoes growing out of PVC tubes, coming to a winter tomato farm near you. Or not.
Read More..

Please forgive me for this political agenda on my gardening blog

I hope you will take the time to read this essay Ive written. It describes the systematic failure of our political system.

The Federal Election Campaign Act (FECA) of 1972 required candidates to disclose sources of campaign contributions and campaign expenditures. It also limited spending on media advertisements. But that portion of the law was ruled unconstitutional — and that actually opened the door for the Citizens United decision. This was a step forward for equality and transparency of our elected officials. But the very powerful very rich were still in pursuit of more control and contrived a treacherous plan to deceive us by suing in two important cases.

In 2010 the US Supreme Court ruled on the Citizens United vs Federal Election Commission and gave corporations and unions the right to spend unlimited sums on ads and other political tools. Its important to note that the Citizens United decision was about spending, not about contributions. This did not affect contributions. For that they created what is know as "independent-expenditure only committees" such as Speechnow.org which represent spending by individuals, groups, political committees, corporations or unions expressly advocating the election or defeat of clearly identified federal candidates.

In 2010 the D.C. Circuit Court of Appeals also issued its ruling in the Speechnow.org v. FEC which removed contribution limits as applied to SpeechNow. Previously the courts had ruled that limits set by the Federal Election Campaign Act applied to this group called SpeechNow. It is still illegal for companies and labor unions to give money directly to candidates for federal office, but together with the Supreme Court’s earlier Citizens United decision allowing unlimited corporate expenditures, the SpeechNow ruling was just what the ultra wealth needed to create a government controlled by "Political Action Committees" (Super PAC) where most of the funding comes from just a few rich individuals.

The Supreme Court kept limits on disclosure in place, and super PACs are required to report regularly on who their donors are. The same can’t be said for “social welfare” groups and some other nonprofits, like business leagues leaving another loop hole for the billionaire industrialist Koch brothers to create a nonprofit called the “Association for American Innovation” that will act as a hub for funneling undisclosed spending towards the Kochs’ political projects.

The American Legislative Exchange Council (ALEC) is another "Business League" which allows corporations and wealthy individuals to use congressmen as lobbyist and collaborate on bills, often presenting industry-backed legislation as a grass-roots organization. It brings Republican state legislators and big corporations together to frame right wing legislative agendas in the form of model bills.

In November we will have an opportunity to vote on reversing the 2010 U.S. Supreme Court ruling for Citizens United. Please vote.

As you know I am an advocate of the https://mayday.us/ superPac. Its time we used their trickery and corrupt laws against them and put an end to "Political Action Committees" (superPAC) . Jim Rubens is the only Republican running for Senate that supports Campaign Reform, but there must be others who would like to get back to running the country rather than spending 70% of their resources on being re-elected. If we persist we can make this happen. Please contribute to Mayday.us
Read More..

Electric Bikes My second electric vehicle

We bought some electric bikes!

Way cool.

Aside from sailing and messing about in boats, there is nothing so normal feeling as riding a power assisted bike.

You stick a battery and an electric motor onto a normal everyday bicycle, and you get an uncanny resemblance to the feeling you get when you go sailing.

Something just feels right about it all.

I thoroughly recommend it.

I bought mine from a company called Dillenger, but so far, I have nothing good to say about them.

Thats not to say I have anything bad to say about them yet, but Ive had a few problems due to damage to my delivery in transit, and it will be a while before I get an impression of the company as a whole.

But...

I started work on Mrs 120ThingsIn20Years bike first, because I knew if I built my own bike first I would just drive away into the sunset and it would be weeks before getting around to building hers.

But there were some problems.

So I started work on my bike.

There were some problems.

In the end we spent a few hours at a local bike shop called MiCycles owned by a thoroughly decent human being who made my bike work.

Thanks MiCycles.

Well see about thanking Dillenger if they finally figure out how to do customer service without being...

lacklustre

If they turn out to be a publicly listed company, I might buy a share so I can go to their annual general meetings and bang on about how poor their problem resolution is.

Anyway...

electric bikes are awesome, you should buy one if you can.

I know I sound jaded, but I today I rode a lot without drinking enough water, so really Im a bit "near death" is all.

I see everything once, just like Yossarian.


120 things in 20 years has spent the last three days on the phone so hasnt posted anything.


Read More..

My Seed Order

I think Ive found a new favorite seed company!
The quantity of seeds in each pack is substantial,  Ill be able to share a lot of this order.  This is not your standard seed store.  Many unusual vegetables and recipes too.
I love the variety and descriptions of the seeds sold at  
Kitazawaseed Company


I have spinach and two types of lettuce started.
Ill have to go vertical if I plant all of these!


ITEM: Seed #181
True Watercress
Cress, Watercress
PRICE: $3.49 ........................... qty 1: $3.49

ITEM: Seed #356
Leisure Cilantro-Corriander
Parsley, Chinese Parsley
PRICE: $3.49 ........................... qty 1: $3.49

ITEM: Seed #361
Arugula
Arugula
PRICE: $3.49 ........................... qty 1: $3.49

ITEM: Seed #372
Green Boy, Hybrid
Komatsuna
PRICE: $3.49 ........................... qty 1: $3.49

ITEM: Seed #154
Taichung 11
Pea
PRICE: $3.49 ........................... qty 1: $3.49

ITEM: Seed #444
Jeok Gat
Mustard, Baby Leaf Mustard
PRICE: $3.49 ........................... qty 1: $3.49

------------------------------------------------------------

SUBTOTAL: $20.94
SHIPPING: $5.35
TOTAL: $26.29
Read More..

Epic solar boat adventurer Stress testing my old battery

Ive had this big old deep cycle battery for years, and I dont know enough about it so I thought Id learn some stuff.

Its a conventional, unsealed, 100ah lead acid, deep cycle thing.

At least I think its 100ah. Thats the kind of thing youd think someone would emboss onto the side rather than adding it as a stamp. That and the voltage.

At least they went to the trouble of embossing the + and - marks.

So with this kind of battery, it seems they dont mind being run down as much as, say... a car battery might. Car batteries hate it when they are run down, and it shortens their lives in a big way.

A deep cycle battery (also called a flooded battery apparently) is a bit more forgiving, but they still see damage with every bit of use. The lower you allow the voltage to get before recharging, the less charge cycles you get from them before they need replacing. 

As I understand it, 11.8v is considered "empty", but thats at rest 6 hours after you stop using it.

I need to know what "empty" is when Im cruising along drawing 20 amps or 35 amps (that being the amount of juice the motor pulls from the battery at speeds 4 and 5 of 5.

So my education for today turned into more questions than answers. It looks like its business as usual.


120 Things in 20 years thinks the Internet might not know something I need to know.


Read More..

My Fish


This pond was built about 7 years ago. These Koi were only 2"
CLICK HERE for 3 minute Video.


This is my aquaponic fish tank
CLICK HERE for 1 minute Video.
Read More..

Stirling Engines My first Stirling engine build

In spite of my video camera running out of battery during filming, I managed to get the first (and only) moments of my first Stirling engine running.

Tis a funny kind of beast running so slowly and deliberately.

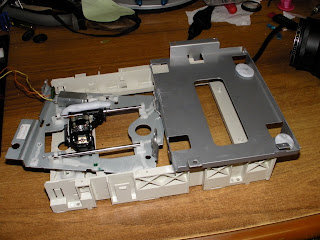
I officially like Stirling engines. Mine looked like this...


It ran for a total of about a minute before the displacer fell to bits. It was sealed airtight, and as it got hot it just popped. It turns out there isnt really any need to make it air tight.

I think.

My displacer started life as a soft drink can.

I marked out a straight line to cut it down to size.

I took a guess as to what size it should be.

I scratched a series of arcs with a bent piece of sharp wire, each at different points, to find the centre, then punctured it with a drawing pin. 

I marked out another can, but this time much shorter.


Then squashed the big one over the little one after turning the little one upside down.
This gave me a sealed can again.

I glued it with super glue.

The gluing was what killed my brand new Stirling  engine after only 60 seconds. As the heat increased, so did the pressure inside the sealed displacer, and eventually it popped open.


I poked a straight length of fencing wire through both holes, then bent and super glued one end to stop it slipping through.


My wire originally had a slight loop at the other end, but I had to cut it off to remake the thing after I glued myself to it.

Dont do that.

And if you want to be really scared, use super glue, then adjust the dials and buttons on your new camera with the same fingers.

Anyway, the main thing is stick some wire through the displacer.

Next I took a tin can and smacked a hole in it with my familys trusty meat mallet.

This meat mallet used to be my mothers (it probably still is), and was used as the household hammer for as long as I can remember.


Here we see the entire family history of hammering.

Actually thats half the family history of hammering. The other half is of course, on the other side.


So then, I took the length of wire sticking out of the displacer (soft drink can thing), and threaded it through the bottom of the tin can.


Like this.

Its a bit difficult to see, but thats the soft drink can displacer thinggy under the tin can.


Next, I took another tin can and drilled a big hole in the side.


And sanded down a small plastic bottle so that its contour matched the tin cans.


Then cut a really big hole in the side of the small plastic bottle.

Something like a pill bottle would work.
All this, so I could glue the small plastic bottle on the side of the tin can with a big hole in the side. 


Next, I stretched a balloon over the entire little plastic bottle, and pulled the slack so that it was tight everywhere but the top.

I also glued a length of wire to the centre of the slack bit.

This, believe it or not, is something called a "power piston".

Ill explain what all this stuff does later.


Next I bent a crank shaft, and some mounting points for the wires coming from the displacer (through the bottom of the tin can), and the wire glued to the balloon (power piston)

The crankshaft has one offset bit (offset by around 8mm) to attach the displacers wire, and another to attach the power piston wire to.

The two offset, (bent out) bits, are at 90 degrees to each other.

So from the left...

straight, then down, then straight, then back up to the original.

That makes the first cranky bit.

Then continuing straight, then back, then straight, then forward back to the original plane.

That makes the next cranky bit.

If you look at the crankshaft end on, if one crank was at 12 oclock, the other would be at 3 oclock (or 9)

I found this almost impossible to get on camera (or to explain), but it looks like this.

Its probably best seen on the video.

The crankshaft is lightly held in place with two inverted U shaped bits of wire taped to the sides. (just visible near the top, left rim of the device)


I stuck a cardboard disk about the size of a CD onto the end of the shaft to act as a flywheel, and then added nuts and bolts with blu-tac until the thing was balanced.

To get them in the right spot, I put the disk in a random place, and if it rolled back to a different position, Id stick on a weight so it wouldnt.

I should have been able to do this with just one weight of the correct size, but for some reason it was beyond me.

So...

  • The displacer is the soft drink can thing inside the bottom can. 
  • The bottom can is sealed ([buy - EDIT  - note from the future-  Who makes errors like this?] by the top tin can) except for the small hole in its top that has the displacers wire poking through.
  • The displacer travels up and down inside the bottom tin can with a total travel of around 1cm.
  • The displacer gets very close to the top and bottom of its tin can container, but never actually touches.
  • The displacers wire is connected to the crankshaft (between pink beads)
  • The power piston (pink balloon) is floopy, and connects to the crankshaft 90 degrees offset from the displacers crank.
  • The top tin can is there to hold up all the other kit, and as the top seal for the chamber holding the displacer (soft drink can thing)
  • When the air inside the bottom tin can heats up it expands, forcing the power piston up. This turns the crank and gives the device its power.
  • As the device rotates, and the displacer moves down, forcing the air up and away from the heat, so it cools and contracts. 
  • When it contracts, the power piston is sucked down.
Thats pretty much it. Repeat as desired, or until something breaks. 

Some light oil can be added to any surfaces that have friction. (where the displacer wire moves up and down into the bottom tin is a high friction area)


==============>>> IMPORTANT!!! Note from the future - It turns out you probably shouldnt add oil to the point where the wire slides through the can. Theres a chance of explosion as the oil is heated to a gas. <<<================


120 things in 20 years - I made a Stirling engine!


Read More..

Testing Garden Assumptions


I dont believe everything I read or hear and tend to experiment with a lot of ideas.  This guy likes to do the same, but I have to say he is doing a much better job of testing garden assumptions.  If you have ever wondered about the efficacy of things like coffee grounds, Epsom salts, or rock dust, heres the place to see for yourself what you might expect.

Read More..

Yellow Mottling on my Spinach Plants


Update 2012/12/23
In this post I examined and searched for the cause of yellow mottling on these spinach leaves.   Finally I found that the cause was an Iron deficiency.  In the months that followed I posted several more articles with good information about this and other nutrient related signs, problems, and solutions.

For a scientific explanation of the chemistry behind the bio availability of Iron go to
[Are These Rocks Nutrient Theives?]
and
 [Assimilation of Nutrients]

For a detailed yet condensed collection of charts and facts go to Nutrient Deficiencies

Below is a record of my wondering search while I learned what I needed to know. I would prefer to simply delete it, but you may relateto my learning curve and find something interesting along the way.


Update 2012/06/07
Im still having problems with yellow leaves.   I have brought my PH down from 8.2 to 6.6 and I have no salt in the system   I have also added 1/2 a bottle of Microbe Lift Chelated Iron. Ill Send an update in a few days with the results.   I have more iron on order as well as a GH/KH test kit.   Hopefully I will get this figured out.

Update 2012/04/14
"A plant injured by excessive sodium first displays mottled leaves or yellowed tissue between the veins of leaves. This is followed by leaves that are dead at their tips, at their margins, and in areas between their veins."  - WateReuse Foundation

My search for the cause continues. I had not seen any insects so I hung sticky cards to trap them.  All I got was two mosquitoes.  Several weeks ago I pushed my salt levels up to 0.35% because I had a few fish that were damaged during the transfer to the aquaponic tank.

Ive been bringing the salt level down slowly and it is now at 0.20%.  In the past when I bumped salt levels up in my pond I did not notice any damage to my ornamental plants, but Spinach and Tomatoes may have a lower tolerance.

I will begin to lower the salt level over the course of the next week and see if the new sprouts show any of the same signs.

Further information:
http://salinitymanagement.org/Salinity%20Management%20Guide/index.html


Update 2012/04/12
After receiving assistance from Zalinda Farms Inc. , I now believe the problem may be caused by Thrip.
If not this information is still a value.  Keeping a vigilant eye on the crop is always important and Thrip is just one of condition to look for.


I have yet to actually see the Thrip, so I will purchase some Sticky Cards.  If I find Thrip I will use  Monterey Garden Spray to control the pests.  The literature indicates that it is a safe bacteria. 

Natures Control also offers several solutions.  One is Predator Nematodes


but in an aquaponic system this may not be an option.  The instructions state "The important things are to use them within 2 hours of mixing, because after that they start to drown".  ... " Theyll live longest when the soil stays moist, but not saturated with water."
I suspect they might be washed away into the water each time the grow bed ebbed and flowed.


Another solution is this Pirate Bug shown above.  They too are susceptible to environmental conditions.
"Thrips Predator Mites (Amblyseius cucumeris) are most effective under conditions of 70-85% humidity, against all species of Thrips. They will also eat an occasional Spider Mite, and other small pests. However, reports have been poor in low humidity environments, so use these predators in greenhouse and other interior locations with high humidity levels only. "


Two types of sticky Traps are also offered by Natures ControlThey say "Customers report success using Sticky Blue Traps against Thrips & Leafminers. Especially recommended for use on roses."


I found further information at 
http://biocontrol.ucr.edu/wft.html
The definitions of INSV and TSWV are as follows:
Vectoring of plant diseases. Western flower thrips is a vector of many plant diseases, the most important of which for greenhouse producers are two plant viruses in the genus Tospovirus: impatiens necrotic spot virus (INSV) and tomato spotted wilt virus (TSWV)


Original Post
I wonder if anyone can help me diagnose this problem Im having with my spinach.
I suspect either a lack of light, salt burn from treating my fish, or a bug, but I see no bugs.
My spinach leaves are mottled with yellow. 

The orange arrow points to a very small white area that I found behind the stem of a leaf I removed.  It looks like foam.

The underside of this leaf has very small round white spots.  This picture is through a magnify glass.
Read More..

Photography My new macro bot

I built a thing today.

It moves stuff in small increments using a small electric motor, in response to a users input.

I guess that means Ive built my first robot.

Actually, probably my second.

Anyway...

My device looks like this


It also looks like this.

The bit with the "1" next to it is my previously built power supply that delivers 5 volts to my project.

The bit with a "2" next to it is the previously made PICAXE Proto Board that connects some input/output pins to my breadboard.

The "3" is the transistor bit, that powers the motor when the chip sends a signal to do so.

And the "4" isnt really visible. If you could see the "4", it would be next to the the switch that the user presses to make the subject move a tiny bit.

The point of this exercise is to attempt to make a device that carries an empty box of mints along a steady track, to carry a subject to different focal distances, in order to make a series of photos to create a focus stack, and thus create an image with a greater depth of field than might otherwise be achieved.

This absurdly simple solution, represents my first successful attempt at creating an electronic something without external help from someone, somewhere on the planet.

All the software does is wait for someone to press the button, then move the subject a tiny bit closer to the camera. This changes which bit of the subject is in focus, and enables the user to take a "stack" of pics, each one having a different plane in sharp focus. The user can then knit them all together using some free software, creating a photo with an otherwise impossible depth of depth of field.

The 11 lines of code that makes it work look like this (the very small amount of black text is the actual software, the green text is just my description of it)

--------------------------------------------------


; Macro Mover ver 2013 06 10 0200
        ;moves a small platform holding a photographic macro subject a tiny amount closer to the camera                    each time a button is pressed, helping to create a "focus stack"
;120thingsIn20Years.blogspot.com
;no rights reserved
;use at your own risk

;For picaxe 08M2

#No_Data saves a few seconds when uploading the code to the chip, because it doesnt have to check for data

main: begin the main program loop

if pinC.1 = 1 then gosub Move    if someone is pressing the button, jump to the bit of code called "Move"

goto main if it gets this far, go back to the start and check for a button press again

Move: the bit of code that moves the platform with the subject on it

do until pinc.1 = 0 :loop hang here until the button is released

high 2 turn on the motorconnected to pin 2
pause 2 wait for 2 milliseconds
low 2 turn off the motor connected to pin 2
pause 100 pause for 100 milliseconds

      return go back to the gosub that called the "Move" code

-------------------------------------------------


I started with an old CD ROM drive that I ripped all the interesting bits out of.

I think this is the original motor because it fits perfectly. This is the motor that made the laser head move from the centre to the rim. Now its the motor that moves the photographic subject towards the lens, changing which bit is in focus.

The blu-tac is there as a weight to keep the linear cog in contact with the gear that the motor connects to.


So the motor makes the black bit move from this extreme...

(see the black bit)


to this extreme, but in tiny increments each time the button is pressed.

Each button press causes a a quarter of a millimetre migration.

.25 mm = 0.0098 inches

A tiny amount each button press.

The camera sits on the large grey platform to the right.


The software controls how much the motor moves at any given moment. This way we control how much we increment the slice of our subject that is in crisp focus.

The camera is securely set in place because there is a tight fit due to my bending some tags in order to hug the camera. There is also two lumps of blu-tac securing the camera to the base.

This arrangement feels totally secure, and I havent had any problems with the camera moving.


Last, but far from least, I added a subject platform  and a light source. The subject sits on a platform made form an empty tic-tac (small mint confectionery) box,

The light source is the thing on three zebra legs.

Its best to move the light source with the subject as it moves toward, or away from the camera, to avoid photos with different exposures, so a light that moves with the subject is best.


Once you have a "stack" of photos with different bits in focus, you can knit them all together with a program like "MacroFusion" (free, open source program I run on my linux computer)

To use this Macro-bot device, you press down once or more times, on a button to move the subject a tiny bit closer to the camera. After each button press (or two or three) you take a photo. Each time you press the button, the subject moves a fraction of a millimetre. I found pressing the button once was suitable for macro shots where the lens was at full zoom, and pressing three times when the lens was at minimum zoom.

Some experimentation is required, but as soon as I made this, I immediately solved all the problems I was having with poor alignment of my photos in a focus stack.

Successful results to follow...


120 Things in 20 years - Sometimes, all you have to do to make a robot, is to replace all the bits from the robot you salvaged last week.


Read More..

Garden in my shop

I had an epiphany today.  My 48 x 36 shop has south facing doors.  My plan is now to remove a roll up door and replace it with polycarbonate and build an 8x10 aquaponic room within the shop.  The material costs will be much less than if I insulate my existing greenhouse and I should be able to control the environment much easier within the shop. 
I found a pretty decent article about how to calculate the requirements of a Passive Solar Thermal Mass System. But Im still looking for the entire package.  Its unbelievable that this information is so hard to find.

In an effort to understand the process I created this spread sheet.   
This spread sheet contains the formulas and data for Specific Heat Density and Volumetric Heat Density.  Its is probably more than we need to know.

I would like to add Coefficient of Heat Transfer and then create a systematic approach to entering the required data in order to design a Solar Thermal Storage System.

Just for grins, I just did a measurement of an unheated room inside my shop.  This room has no insulation in the floor and R19 in the walls and ceiling of this room which takes up about 1/4 of my shop.  The outside temperature has ranged from 43F - 65F and inside the room has ranged from 46 to 56F.   So what I learned from this is that the thermal mass inside this room levels out  near the low end of our daily temperature swings.

Update June 15, 2012
Its now June 2012 and the temperatures are over 100F  With the ad of an evaporative cooler the garden room stays at about 82F.  In February with a little help from an electric water heater element in line with the pump the room stayed a comfortable 70F.   The power to control the environment is probably costing me about $1.50 - $2.00 a day at 33 cents per Kilowatt Hour.  
Compared to previous green house attempts this is extraordinary.   This is still my first year and Im experimenting, but I think I used too much supplemental lighting during the winter months.  Next winter I will cut that back and only use it to extend the hours rather than add brighter light.
Read More..

This is my tank heater

UPDATE:
2013/01/18
Several months ago I built this heater with a stainless steel element. Its actually refered to as an Incoloy type water heater element  (120-1500-ELD.

You can purchase them online here at http://www.plumbingsupply.com/elements.html

This heater now floats in the sump tank.  Its very important to add something buoyant at the end opposite the cord so that air bubbles leaving the element do not get caught in the small area where the element screws into the plastic housing.  Even this very small amount of exposure will burn out the element.


Previous Designs


 2012/03/19
Today I made the mistake of unplugging my pump while the heater was on.  PVC smoke quickly filled the room and the element died.
.
Here is my new design.  Its made of 1" galvanized pipe, but the element will still self destruct withing seconds if its run dry so I have moved it to a position below the level of the sump tank.  The outlet is above the fish tank so it will not draw a siphon but the water level will drop to the level in the sump tank.
If I should loose the pump the water will boil inside the pipe, but this galvanized pipe will not burn.
The thermostat can not operate at boiling temperature, and will still burn and self destruct within seconds if the water is not flowing.  At least this will prevent heating galvanized pipe. - Just looking for a bright spot to an unpleasant situation...

I will not be using the Honeywell Thermostat because the water changes so slowly that I can regulate it as I wish by flipping the switch on and off.  The temperature changes by about 4F per day.
 
If I ever choose to hook up the thermostat I think I may be able the use the high cut off temp as a safety.
But there has simply been too much to do.

My plan is to use an 1-1/2" PVC elbow to cover the electrical connections.

Original Post:
This is my heater. It uses two 1500W elements in series to drop the current down below 8A which is the max amperage my Honeywell 675 thermostat will handle.  In this picture I am using only one element without the thermostat in order to deliver more heat.
Its an inline flow through heater. It works very well and should last for many years. As long as water flows through the heater it will not over heat.  I would like to add a relay that will only allow the heater to be on when the pump is on and water is flowing.
The elements are rated at 1500W, but measurements indicate only 1300 W are actually being used when only one element is used, and when placed in series 750 W is drawn.  I attribute the difference to line loss even though the building is wired with 12 gauge.
The elements screw into 1" female adapters.  The housing is made of 2" PVC.  When I put my hand on the heater, I can just barely feel the heat, but over time it will maintain my 1000 gallon system which is well insulated.
Read More..

Oh Where are my BSFs

The cryptic saga of my Black Soldier Fly Larvae


I dont have my BSFs yet. I dont know how theyll be doing by Monday - the 7th day since they were shipped.

USPS claims they left notices - I think theyre knocking at the wrong door, because I was here at 3:09 today. There was also someone at my house ready to receive the larvae yesterday. And weve seen no written notices.

In the mean time weve got lots of compost waiting for the BSFs when they do get here. Assuming they are still alive by then...
Read More..

What I Learned From My 2014 Summer Garden

I wanted a record of this years garden.  The foliage grew so thick in the hydroponic section I was unable to track down a leak.  Usage became ridiculous and I ended up filling the sump twice a day with water rather than waste the hydroponic fertilizer. 

The bioponic systems did well.  Summer heat put a damper on everything including the tomatoes.  Even the squash seemed to regain vigor once the 100+ days passed.  Bell peppers in the hydroponic system did well, but failed due to blossom end rot in the bioponic systems.  I found [this article about Blossom End Rot] that may be helpful.

One Earthan bed became clogged by a root and I lost all the flowers on my Tomatillo, but even though a second set of flowers came back, I doubts I will get a crop.

My wicking barrels did not wick quite as well as I would have liked.  So Ill adjust the soil mix.  These barrels did not get enough sun in this location, so I will have to find a different location.  That is one of the best attributes of this simple low cost design.  Relocation is not a problem.

The vertical section will get a modification to the water supply.  I plan to install a check valve after the pump and a high pressure connection after that.  When the 1/4" tubes clog I will simply give it a blast of fresh water.   In fact this is how I will maintain the level in the sump tank.  Each time I fill the sump I will be clearing the 1/4" lines.

The 8W Earthan Bed system performed well over the summer.  Water usage was extremely low in both the wicking barrels and the 8W Earthan Beds.  Without a doubt I feel these two systems hold the most promise.  But one thing Ive learned is that any garden that relies on a mechanical system is prone to some type of failure which places the wicking barrels squarely in the best position.

I began the season using weed teas, fish emulsion, and kelp in the 8W Earthan Bed and the Vertical Garden, but the Vertical Garden was abandoned due to high maintenance (clogging).

After the other bioponic Earthan Bed clogged I began to fear that the system might become clogged, but I now feel it would have been okay since it was a root not muck that caused the problem.

But this caused me to switch the 8W Earthan Bed over to plain well water with an occasional slurp of fish emulsion and liquid kelp plus a little Fe DTPA, MgSO4, and HCl after only a few weeks.  My goal for this system was to use no urine.

Clogging is a concern I will eventually have to face with all of the Earthan Beds as I doubt even the worms will be able to keep the rock bed clear forever.   The advantage is that the water stays well aerated which should increase plant vitality and vigor. 

Water use was extremely low in this systems even though I top watered every few days.   

Im still enjoying handfuls of cherry tomatoes from every section of the garden everyday The soil less section of the bioponic system produced more cherry tomatoes than we could eat. This and the hydroponic section were the best performers.  I credit this to aeration and high nutrient levels.  The main bioponic garden (not the 8W garden) received about 50% of my fresh urine plus fish emulsion, kelp, Fe DTPA, MgSO4, and HCl.


Read More..

Thinking Paradise

Paradise is usually documented by pristine beaches that have an opalescent, turquoise quality.

Its just polarised light.

Buy some polarised sunglasses and look at your local beach.

Wear them all the time, and theres no need to fly anywhere!

This tip brought to you in the interest of staying at home. Its got everything you need!

Except broad horizons.

No matter where you are, the horizons are not broad enough.

Travel if you can.
Read More..

Aquaponics External Tomato growing in fishtank

Ive been away for a few days.

It was nice.

One of the best things about aquaponics, is the fact that it takes care of itself. I came home to a system overflowing with produce, and with lettuce that was ready to eat, where when I left, it was nowhere near ready. Its amazing what a few days can do.

Also, not seeing my system for a few days made me realise just how big my tomatoes were getting.

Thats them hanging off the side of the little grow house.

Im calling this experiment a complete success. I had to tie the foliage to the growhouse to support it, because it was starting to pull the roots out of the water.


Theres fruit forming everywhere, and in spite of the late start due to pruning it all back to only a few leaves, I think it will be a good season. Once the capsicum season is over, I think I might just pick up the tomato, and move it back inside for winter.

The tomato grows through a PVC pipe to stop it growing inside the growhouse, and the roots are all just hanging inside the fish tank. There is no media involved, and it relies on the water being oxygenated by the water movement, and the nutrient it gains from the fish.

This has been a lack luster post.

Im sleepy from too much driving.


Read More..

My new avitar

My new avitar on  community.theaquaponicsource.com  seems appropriate.  
 
Maybe my seeds will begin to sprout better now 
Njörðr is associated with sea, seafaring, wind, fishing, wealth, and crop fertility.


Read More..

Miss Utility changes my plans

The reason my fish tank is full of petals...


The weather has been beautiful, and so I decided it was time to start digging the planned 18" hole for my sump.

Turns out there are utility cables buried I want my sump to be. I was able to dig the sump a few inches down without interfering with the utility lines, which should be enough, if not as much as I hoped for.

Since I cant go down deep, Ive decided to ditch the sunken walkway idea and go upward instead.

The fish were in the 100 gallon tank I intend to use as the sump. In order to move the tank, I drained all but 2-3 inches of water out into the 150 gallon tank. In the process I was able to see all the fish. In addition to the minnows, there are still a surprisingly large number of blue gill and redear.

One of the blue gills looks much larger than any of the fish I plopped in the drink on March 18. Ive never seen the blue gill or redear eat food Ive tossed in the tank, so either theyve not needed food, have slurped old food/insects/leaves off the bottom when I wasnt looking, or theyve been snapping up minnows at their leisure.
______________________

Since the permanent structure can only be 52" tall, I plan to make it so the roof can be easily and securely elevated when needed. When I get it done, Ill be posting pictures of the greenhouse with the roof in both the raised and lowered positions.

In the mean time, its just been lovely to be able to be outside in my yard during this time of year - something Ive never before bothered doing in the 14 prior springs Ive spent in this house.
Read More..